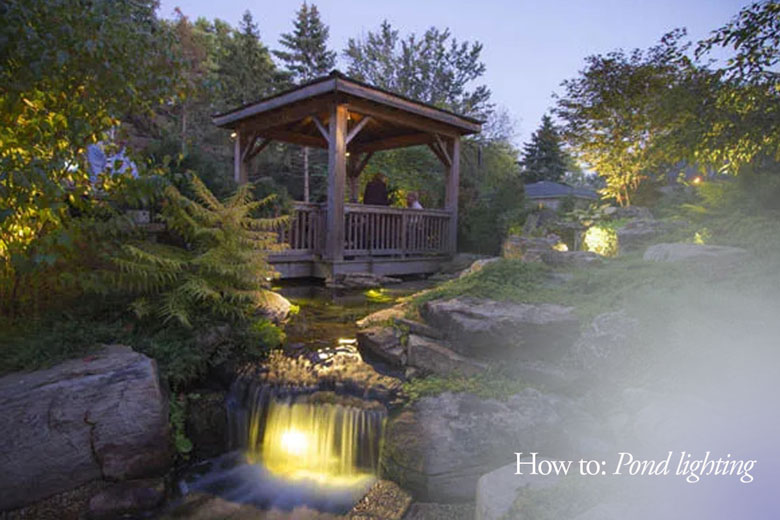
A pond can bring tranquil pleasure to your backyard. The soothing sound of cascading water and the shimmer of sunlight reflecting off fish can bring an ethereal ambiance to the outdoor space. But why limit the enjoyment to daylight hours? With pond illumination, you can transform the pond into a spectacular sight after dusk.
Light a waterfall or bubbling fountain to cast a soft glow upon the pond as well as highlight the surrounding foliage and rocks with dancing light. Even small fish and koi ponds offer interesting lighting possibilities.
Apart from underwater lights, other options such as external lighting and floating lily pad lights, and illuminated globes can be used to great effect.
With pond lighting, the adage “less is more” rings true. Opt for soft illumination within the water. The pond lighting should complement the overall lighting scheme.
Scroll on as we dive deeper into this.
Why light a pond
Safety:
The key to pond lighting is to enhance safety. By illuminating the water’s edge, pathways to and around the features, stepping stones, and bridges, you can ensure safe movement at night while highlighting specific features within and around the pond.
Aesthetics:
While safety remains paramount, aesthetics need not be overlooked. The goal is to provide lighting that artfully accentuates the pond’s beauty.
One way I would go about this is by highlighting elements within the pond such as a sculpture or a pond figurine. Features that look great during the day can be accented to look even better at night. Accenting specific features at night draws attention to them and adds interest to the space.
But do not forget to provide an even level of functional and ambient lighting. The pond should look great from all main viewpoints be it a backyard patio or deck.
Each fixture should have a purpose behind it: whether it is general, task, or ambient lighting. Thoughtfully select fixtures, turn eyelids/cowls (glare shields), use hex baffles and cleverly nestle the fixtures behind foliage and other landscape to conceal the light source from view.
The focus should be on the effect, not the source. You also don’t want a distracting and annoying glare to chip away at your enjoyment.
Best time to install lighting
For optimal results, install underwater lighting during the pond’s construction. Work with your landscaping designer and contractor to envision the pond and the lighting as a cohesive design from the outset. Think about fixture, conduit, and wiring placement to allow for a straightforward installation.
However, if you’re adding lights to an existing pond, do it during a spring cleanout when the pond is empty.
Pond Lighting Techniques
There are two main pond lighting techniques;
- Underwater lighting
- External lighting such as downlight from overhead trees
Underwater lighting
Underwater lighting is a popular and fun lighting technique. Subtle and discreet, underwater pond lights are designed to be placed below the water’s surface. They create a sparkling effect as the light filters through the water and artfully illuminates pond lilies and water reeds.
To achieve a gentle and pleasant illumination, consider using a single or two broad beam angle (>60º) diffuse wash lights nestled among the shallow shelf’s edging rocks. This softly washes the pond’s depth with light and accentuates the water’s edges. Placing lights about 4 inches below the water’s surface allows for a subtle diffusion of light that won’t overpower the space.
Water diffuses light; losing around 10% brightness for every 2 inches of depth. Adjust the number of lights or use higher-lumen lamps to achieve even illumination with deeper installations.
Submersible lights are not effective in murky water. They highlight floating debris, making the water visually unappealing and dimming the lighting effect. In such cases, it’s best to stick to exterior lighting.
External lighting
When underwater lighting is not possible due to wiring challenges or murky water, external lighting is a viable alternative. These lights, not being submerged, better withstand the test of time and are easier to maintain.
There are various external lighting options, including;
- Directional and in-grade uplights or washlights to illuminate trees, rock faces, foliage and other features around the pond periphery.
- Downlighting from trees or eave of the house
- Pagoda style, cone or mushroom shaped pathlights at ground level along the pond’s showline and to highlight a natural stone path or steps to the pond.
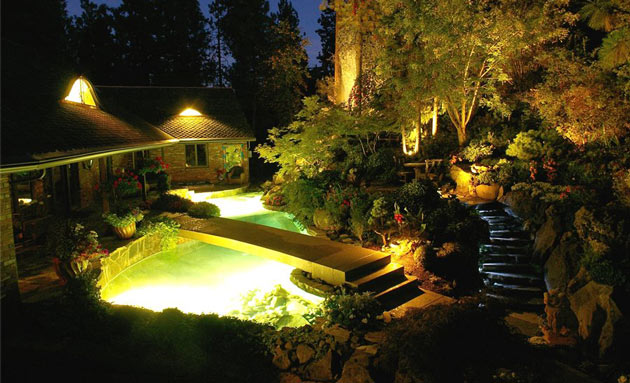
- Residual lighting from architectural facade, garage or from an outdoor kitchen.
Create a mirroring effect on the pond with underwater turned off or dimmed way down. The uplit Japanese maple or red oak, perennials, topiary or statures surround the pond will reflect off the water’s surface for a captivating mirroring effect.
External lighting can be combined with underwater lighting for a balanced and seamless lighting scheme by illuminating elements around the pond.
Uplighting/Accent lighting
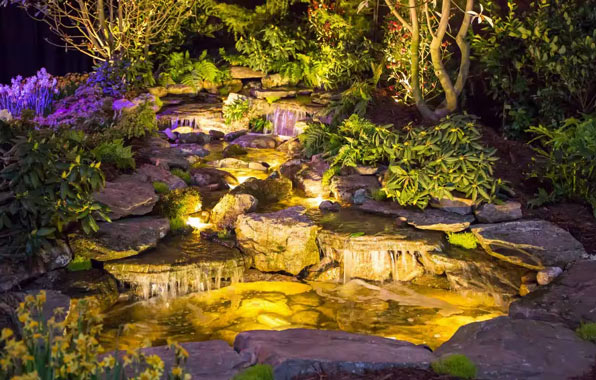
To enhance the beauty of your pond and its surroundings, use accent and wash lights. These highlight low-growing plants, perennials, specimen trees, or the rock faces. The lights are positioned as close to the water’s edge and concealed cleverly, directing a soft pool of light onto a subject or illuminating a waterfall.
Consider using a bullet lights aimed precisely at the point where the waterfall meets the pond’s surface. This setup captures the air bubbles and accentuates the movement for a truly dramatic effect. Alternatively, you can wash the fall and rocks from a distance using diffuse light.
Conceal the light sources among low-growth or using cowls and hex baffles to soften the light and to avoid glare.
Downlighting
Downlighting creates a natural effect since most of the lighting we experience is from above. This can be achieved using downlight installed on an overhead tree or eave/dormer or your house.
Simulate moonlight using medium beam angle directional or pendant downlights installed on a secondary canopy of a mature tree. This creates a dappled lighting effect (interplay of light and shadows from leaves and branches) on the surface, low growth, path and pond below.
Washing water lilies, decorative grasses, hostas and other plants provides a beautiful backdrop that frames the pond’s shoreline. Pendant downlights, in particular, sway in the wind for dramatic effect and interest.
Fixture selection
From incandescents to LEDs, downlights, and uplights, it can be challenging to select the right fixtures given the multitude of options.
Several essential factors warrant consideration in this regard, including;
- Fixture’s construction– materials utilized, the finishing and build with quality
- Lamp type and lifespan
- The desired lighting effect and lighting technique
- Safety of the fish
1. Fixture construction
Light fixture should be watertight and robust.
Moisture protection
While water feature lights are obviously exposed to water due to submersion, even lights placed near the edges of ponds or waterfalls are susceptible to water contact, as the pond environment tends to splash and find its way into the system.
An IP68 rating is required to protect the lamps, sockets, and other internal components from water intrusion. While no underwater fixture can be 100% leak-proof, choosing the right material, sealing andproper engineering can significantly reduce the likelihood of leaks and failures.
Fixtures that use integrated lamps tend to hold up better against moisture than those with drop-in lamps. But drop-in fixtures are easier to maintain and replace.
Materials & Finish
For durability, it’s best to opt for UV-stable composite (plastic), brass, or stainless steel fixtures.
- Composite and ceramic fixtures may be more affordable but are prone to failure due to temperature fluctuations and UV damage.
- Aluminum fixtures are less common because they are susceptible to corrosion, even with protective treatments like powder coating.
- Stainless steel, however, due to its chromium content, resists corrosion and offers reliable performance when properly engineered with tight-fitting gaskets.
- Brass, a non-ferrous alloy, is the most durable choice for submersible fixtures. Its resistance to rust and corrosion makes it particularly suitable for marine applications.
Avoid using copper fixtures as submerged lights. Copper is toxic to fish and can leash into the water harming or even killing them.
Be sure to select light fixtures with finishes that blend with the surrounding. The aim is to draw attention to the lighting effect other than the light source.
2. Lamp type
LED vs Incandescent:
LED lamps can significantly reduce your energy bill; they draw about 15% the wattage of incandescents. They are much more efficient allowing for brighter levels of illumination at a lower power draw.
Most LED lamps operate at 12 to 15 volts and require a transformer to step down the voltage from ~120 volts in the US (220 volts in many countries) to 12 to 24 volts. Working with a low-voltage lighting system outdoors is safer and eliminates electric hazards.
Some LED lamps are designed with dimming and color changing in mind allowing for much more precise control of the light output.
Be sure to match the lumen output with the feature you are lighting. Accent lights are the brightest allowing you to highlight focal points and punctuate the space. Task lighting such as path light is less bright and general illumination (ambient lighting) is the least bright and much softer. Use soft lighting for the main basin of the pond and accent lighting for a fall or fountain.
Kelvin Temperature:
Kelvin temperature describes the color (coolness or warmness) of the light.
Most landscape lighting designers recommend submersible light fixtures that produce a warm white (amber) light. Warmer lights (2700K to 3000K) make the pond warm and inviting. However, if you have white koi in your pond, a slightly cooler color temperature (about 3500K) preferred to avoid dulling their vibrant colors.
For added fun and drama during special events and holidays, consider using color-changing RGB or RGBW lights. Some pond lights feature color filters that alter the color temperature.
Beam Angle:
Beam angle or beam spread is the angle from which light is produced from a source ranging from narrow spots to very wide flood or wash lights.
- Use the focused beams spot or bullet lamps (5 to 35º) to accent specific features such as figurines or small waterfalls and to reach the top of tall trees
- Medium angle beams (36 to 60º) flood for general illumination and to highlight large features
- Wide floods (>60º) are great for washing larger shrubs, and rock faces and for general underwater illumination.
Keep in mind that beam spread will affect the lumen output. A 5-watt spotlight will be much brighter than a wash light of the same wattage when lighting the same object from the same distance.
3. Desired Lighting effect:
Fixture selection will be informed by the desired lighting effect in mind. Consider features you would like to illuminate the effect you wish to achieve.
It is not necessary to illuminate the entire pond; instead, focus on accentuating specific features like a waterfall and fill-in light to balances the design for the general illumination. Think about the areas around your pond where you spend the most time and focus on lighting those spaces.
The adage “less is more” rings true here. Avoid over-lighting. Aim for a subtle and soft glow within the pond. Borrow inspiration from nature. Think moonlight. Does it overwhelm the space? Let your landscape lighting follow suit. Add subtle accent lights to enhance the appeal of your pond’s best features.
Careful Fixture Placement
Planning the lighting layout and fixture placement necessitates foresight. The proper selection of fixtures is equally important to placement and balancing the lighting.
Consider situating one or two fixtures beneath cascading water, discreetly hidden from view behind foaming water. Aim the light at underwater walls or external features such as fountain jets, boulders, or plants to create captivating visuals.
To install an underwater fixture under a waterfall, mount it on a brick or block, or behind rocks and use pond foam to secure it against the movement of water. Alternatively, certain underwater luminaires can be filled with gravel and placed at the bottom of the pond for added convenience. It’s best to avoid using flimsy plastic stands.
Keep in mind that light refracts underwater. So, experiment with various lighting positions and layouts to find the most suitable placement.
Create darker areas and hiding spots for fish and other pond inhabitants, offering them a quiet and sheltered environment. Secluded caves, far corners, decorative structures, or collections of stones can provide them with a place to retreat and maintain their natural behaviors. Consider turning off the lights around midnight
Glare is a significant concern in any lighting scheme. Precisely position the fixtures to avoid shining lights directly into people’s faces, especially with multiple viewing points to avoid dazzling the viewers. Conceal the external fixtures between the rocks or plants forming the pond’s borders.
When adding underwater lights to your pond, keep them submerged throughout the year unless necessary for annual maintenance. Repeatedly drying out and re-submerging the lights can wear out gaskets and water-proofing components, potentially leading to leaks.
Wiring & Powering the lights
It is essential to install a transformer close to a GFCI-protected outdoor power outlet. The transformer should be at least 10 feet away from water. If there is no GFCI outlet available, hire a licensed electrician to install one.
Many transformers come equipped with a photocell to automatically activate the lights at dusk and deactivate them at dawn. Integrating the photocell with a timer offers finer control of the lighting, turning off the lights around 11 to midnight.
When setting up the lighting system, have adequate power cord length from the transformer to the fixture. Have approximately 3 feet of slack to allow for easy access to the fixture for occasional lamp replacement.
Conceal the wires and/or wire conduit to keep them hidden from view against the back edge of the pond liner. Use the right conduit for running wires through boulders. Thick-walled pipes with a high PSI rating are preferred over flimsy funny pipes, which can be easily crushed during backfilling. For color-changing lights, an even larger pipe is required to accommodate the wires and attachments properly.
To ensure watertight and weatherproof connections, use outdoor-rated electrical tape and silicone-filled wire nuts, drums, or lever connectors. This keeps connections secure, even if someone accidentally tugs on the wires.
Maintenance:
Regular maintenance is a vital for landscape lighting.
Maintenance, inspection, bulb replacement and cleaning carried during spring cleanout preserve the performance and longevity of your lighting systems, especially those submerged in water. All wire connections should be checked, lenses cleaned to remove moss, algae and debris accumulation and the fixtures repositioned
A malfunctioning underwater light fixture, defeats its intended purpose and renders it ineffective in illuminating your landscape.
To Wrap up
Each pond is unique. There are no hard-set rules on how to best light each feature. Regardless, lighting should showcase the pond’s best features and draw attention to key elements.
It is important to provide soft ambient and functional illumination. Brighter lamps should be reserved for accenting focal points such as a sculptural fountain.
If you are unsure where to start, do not feel overwhelmed. Collaborate with a certified landscape lighting contractor. They bring expertise and a wealth of valuable information to the table helping bring your vision to life. They adhere to set code and safety standards, ensuring a well-executed and safe lighting design.
