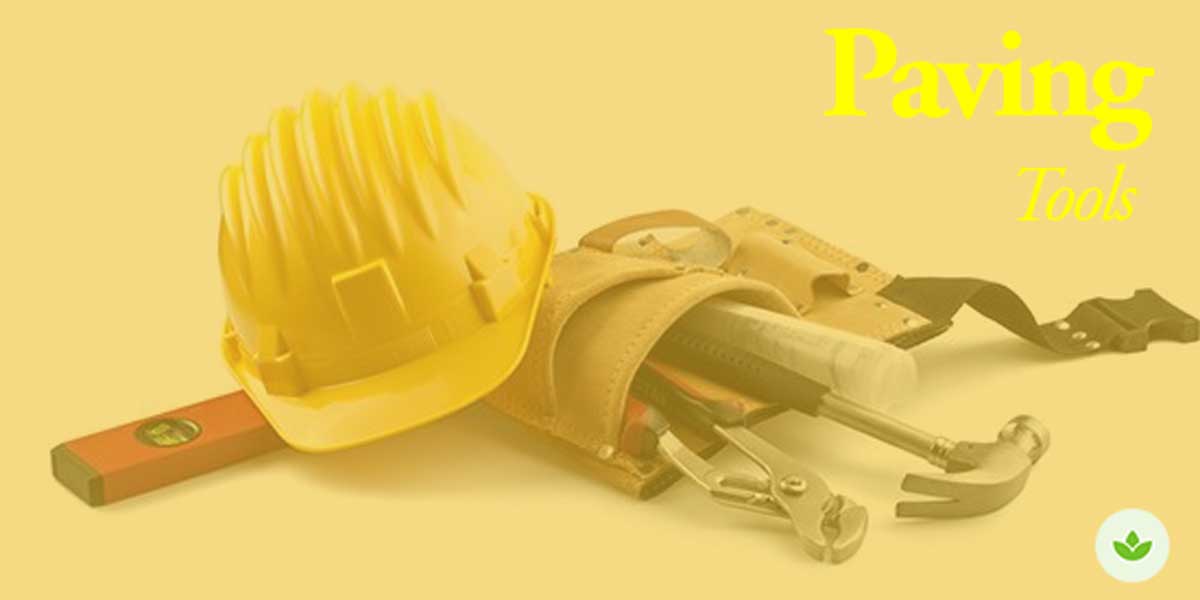
You may already be familiar with the everyday tools needed for a DIY paving job. The toolkit for paving your garden or patio might surprise you—it’s a concise lineup of familiar companions, ones you’ve likely wielded in your DIY adventures.
Even then, most of the tools in this list are well worth buying. You are sure to find additional uses for many of them. For instance, a club hammer and mallet have many uses around the home and garden. Some of the tools such as a builder’s square can be improvised from scrap wood.
In addition, you do not need to buy expensive equipment like a block splitter or flat plate vibrator. You will only use them once or twice, so you can hire them instead at a local equipment store.
Stakes/Pin flags:
Also called survey flags or stakes and string, these markers outline the perimeter of your pavement. Stick the flags in the ground at regular intervals, or pound in wooden stakes or lengths of rebar at the corners and run a taut string from one stake to another.
Make pegs from excess or reject lumber or offcuts.
For a patio with a rounded or curving shape, you may want to use a rope or a garden hose to mark the circumference, instead.
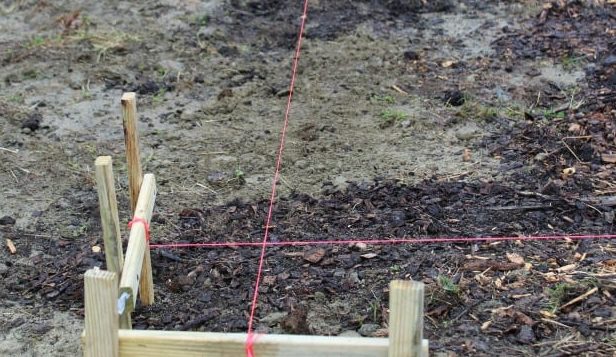
Stake (batter board) & String
Tape Measure:
You will need a good quality retractable tape, ideally with a locking mechanism. This indispensable tool helps you know exactly where to plant your stakes. What’s more, it is crucial to excavate the correct depth and make precise cuts around corners and features.
They come in various lengths, 25 feet (7.6m) and 50 feet (15m) are both useful.

25ft Tape measures
Marking Paint:
Once you have marked the perimeter of your paving area with flags, stakes, or a hose, you will want to mark the lines on the ground. This is a guide on where to start digging.
You could also snap a chalk line if you are marking a straight line between two points.
Marking paint in a painting wand
Carpenter or Framing Square:
Squres are useful for checking the right angles of any corners in your floor layout.
Steel builder’s squares are fairly bulky tools, but more accurate than homemade ones. Of course, you can use a homemade square to lay out a patio. To make one, cut three lengths of sawn wood in a ratio of 3:4:5 and join them to form a triangle.
Alternatively, use the 3:4:5 method, measuring and pegging to check for squareness.
2) LEVELING TOOLS
Good paving practices demand that surfaces are flat and that the corners are square. Certain inexpensive tools will help to ensure accuracy; some may even be made at home.
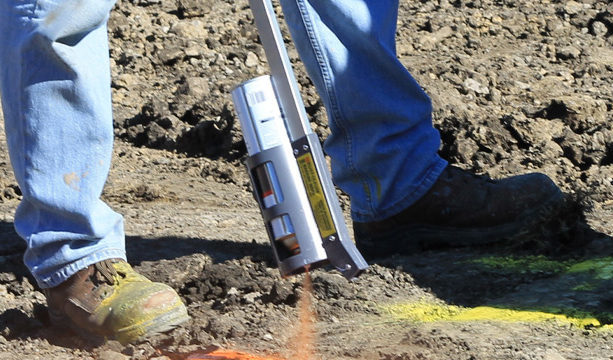
Four-foot level:
Use this tool to check the level of both vertical and horizontal surfaces, beginning with the grading of the site you are marking.
Available in several lengths, they usually incorporate two spirit vials. If the bubble in the vial is centered, the surface is level. Although 4 feet is a handy length, you will have to use it in conjunction with a straight-edged piece of wood if you are checking a patio or a long path.
If you already own a slightly smaller or larger level, it should work fine.
4-foot spirit level
String Level:
This small, lightweight device that clips onto a taut string does the same job as a Spirit level but is handier for leveling longer stretches of your paving surface.
When paired with a string level, it ensures a perfectly straight patio edge. Also helpful in aligning joints accurately.
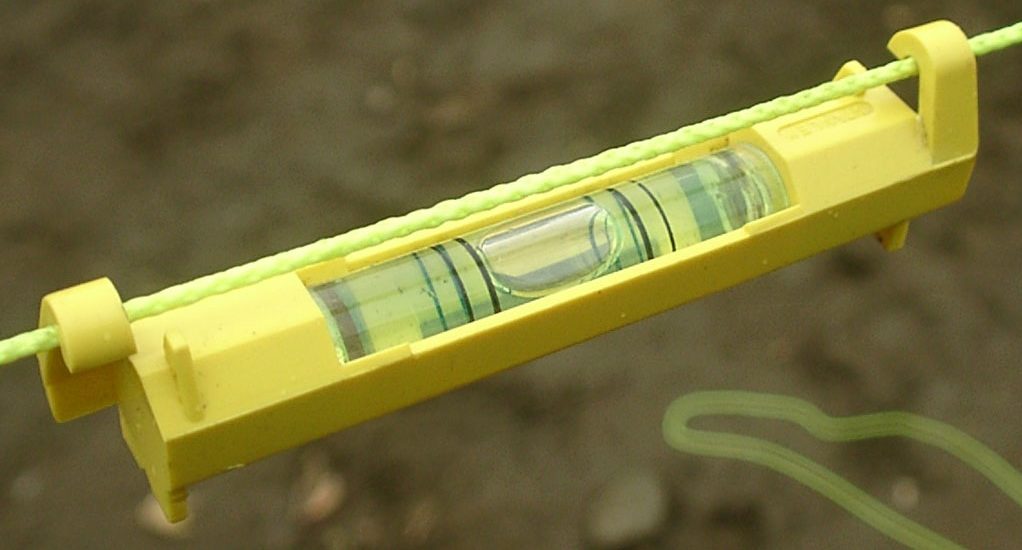
String line level
Water level
Water levels are simple homemade tools that work well over large areas and are invaluable when you are setting out a slope or when there is a need to establish points at the same height around a corner. They are also a useful aid in making a profile for steps.
All you need is a length of transparent tubing or hosepipe filled with water. Working on the principle that water finds its own level, attach one end to a post or to brickwork so that the water is at a specific height (the datum level). Then take the other end of the tube to another point whose height you wish to measure. Take care not to spill any.
The level of the water here will be exactly the same height.
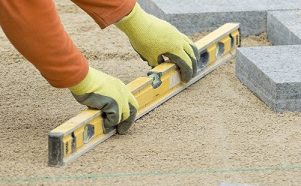
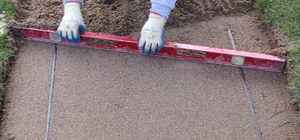
Straight Edge
Use a straight edge to ensure that paving is laid to an appropriate level or fall.
All you need is a piece of wood about 8 to 10 feet long. Make sure it has straight, parallel sides and is not warped or distorted. You may have to cut notches in the end to the thickness of the paving if you are preparing a sand bed for pavers.
3) EXCAVATION TOOLS
Shovel:
Essential tool for digging and moving mortar onto the sub-base directly from a wheelbarrow or scraping loose soil during excavation and loading materials into a cement mixer.
- Round-nose shovel: For good, old-fashioned digging and spreading materials into the excavated area as well as mixing concrete and mortar.
- Square-bladed shovel: Good for cutting out edges, leveling rough spots, skimming grass, and scooping crushed rock to fill your foundation.
Opt for a long-handled shovel to reduce strain on the lower back.
-
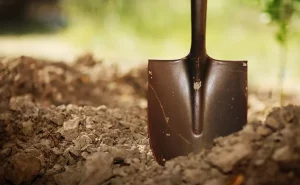
- Round tip shovel
-
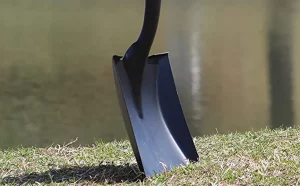
- Square shovel
Mattock:
A broad, slightly curved digging blade at one end and a small chopping blade or pick at the other make a mattock the perfect tool for loosening packed earth and embedded rocks, and cutting out roots.
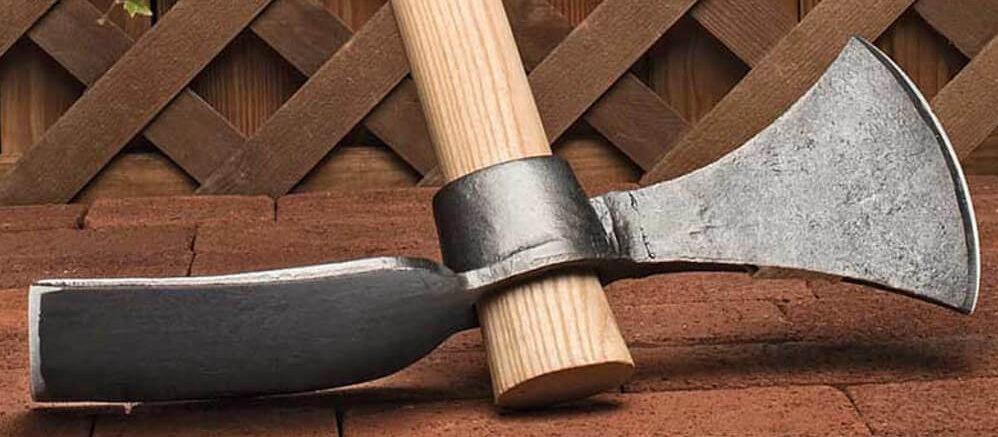
Steel & hardwood mattock
Hand Tamper:
Compact gravel in layers as you add more material to create a firm base for your paving material. Hand tampers feature metal plates, typically 8 or 10 inches (20.3 or 25.4 cm) square
For an extensive site, you may want to rent a power compactor or drum roller.
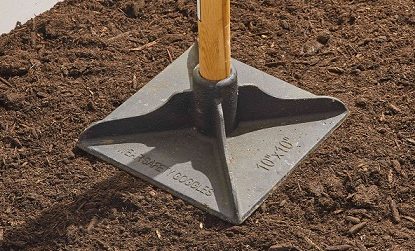
10 by 10 inches steel hand tamper
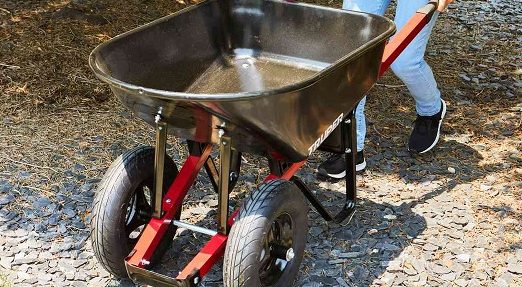
Wheelbarrow:
You will need a wheelbarrow for hauling out dirt and for hauling in materials to fill the foundation. If you are mixing concrete, get a heavy-duty pneumatic tire wheelbarrow.
Gardening wheelbarrows are not suitable for construction work.
- Other optional excavating tools include lopping shears or a pruning saw, which help cut back small roots, for skimming the sod off the surface of your site, and for breaking up clay.
4) GRAVEL LAYING TOOLS
Metal Rake:
You need a rake with some force behind, not the leaf rakes. As you begin dumping in loads of crushed rock and later sand to fill the floor foundation, use the rake’s teeth to spread the material into place and the other side to smooth and level it.
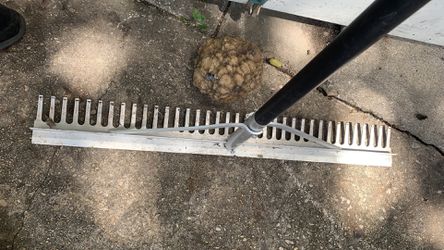
Metal gravel rake
Screed:
A screed is simply a scrap piece of 2 X 4 or magnesium screed bar (much heavier) you will drag across your foundation’s sand-setting bed or across just poured concrete to level the surface.
When leveling a setting bed, you will want to cut notches out of each end of your screed, so it fits over path edging and levels the sand to the appropriate height.
Floats, made from both wood and metal, are used to smooth the mortar used for rendering and for screeds laid over concrete.
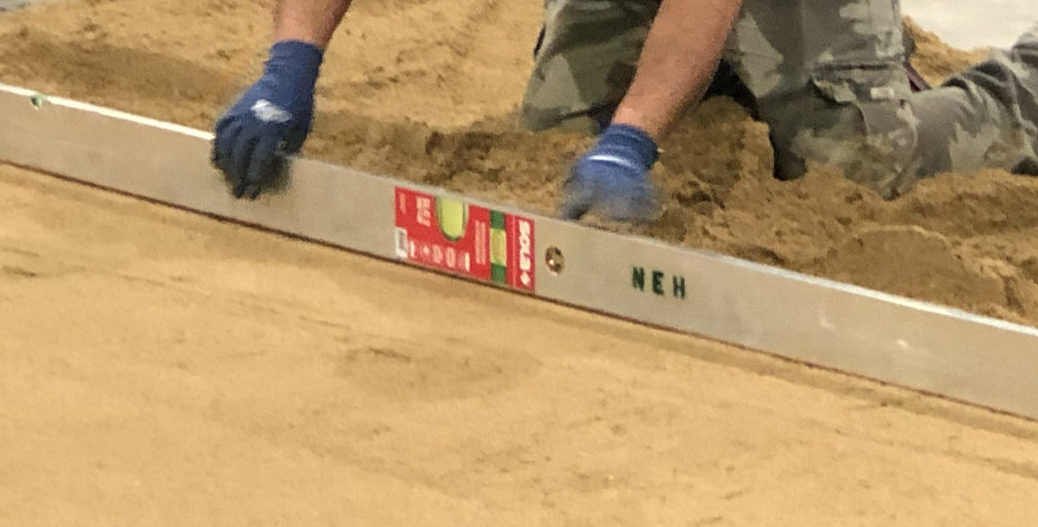
Metal screed bar
Screed Rails:
To guide your screed for a smooth level. Steel pipes, at least 3/4″ diameter galvanized steel in either 5 feet or 10 feet pieces, work best.
Screed rails guide the screed bar for path gravel leveling
5) PAVING TOOLS
Hammer:
An ordinary claw hammer is useful for knocking in pegs, extracting nails, and assembling forms for concreting and profiles for steps.
A club hammer is useful for heavy-duty tasks such as breaking and consolidating hardcore.
A brick hammer (which has a chisel end instead of a claw) is the answer when it comes to breaking and trimming bricks for bricklaying and paving
Rubber mallet:
After laying your pavers onto fine gravel or mortar, this handy tool will help you tap and settle them into place. Rubber mallets are strong enough to move the pavers without breaking them.
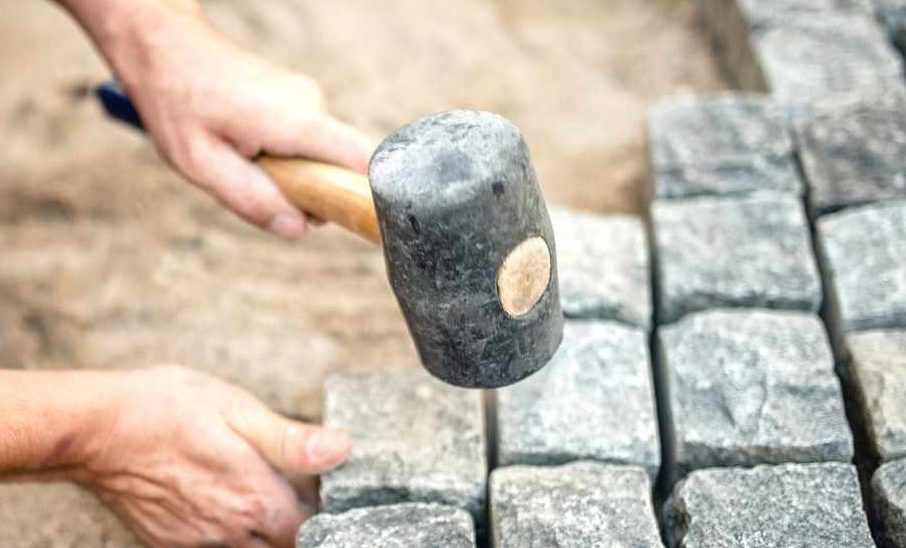
Rubber mallet setting granite cobble setts
Mason Chisel:
When working with some pavers, you can use a mason’s chisel to carefully chip them, helping them to better fit in place.
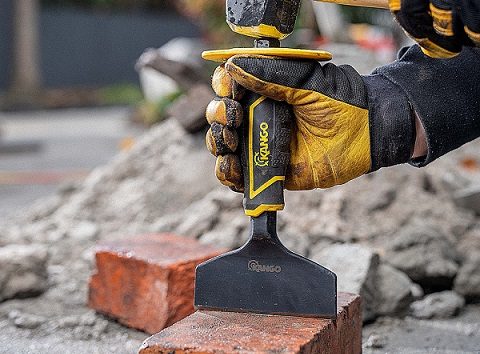
Chisel splitting brick
Mixing boards
Although it is possible to mix concrete and mortar in small quantities on the ground, close to the work site, you may want to do this on an old board to prevent contamination with soil.
If you have nowhere convenient to mix up your materials, buy a plastic mixing board. These have a lip to stop run-off from staining paving or contaminating soil.
Paver spacers
You can also make pegs and spacers from scrap wood for pavers that require an even gap.
6) FINISHING TOOLS
Stiff-bristled broom:
Indispensable for sweeping sand into your floor’s joints and for cleaning the surface of your floor when you are finished. A small brush can help in tight areas.
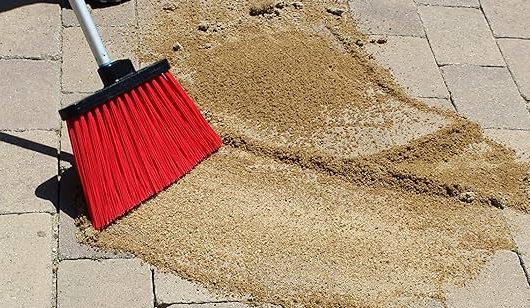
Hard brush sweeping sand between paver joints
Trowels:
Trowels come in various shapes and sizes, including bricklaying trowels for spreading and applying mortar (rendering) and pointing trowels for finishing edges and joints.
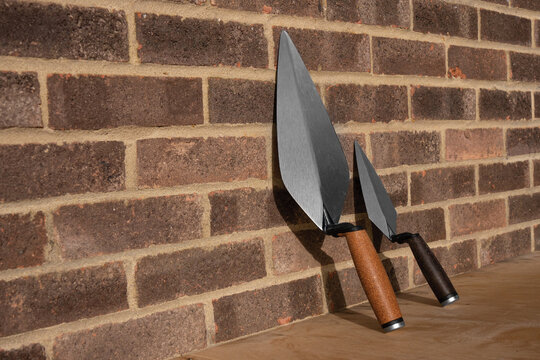
From left to right: Trowels for spreading mortar and pointing brick joints
Hose:
A fine spray of water will help settle floors of pavers laid with sand or dry mortar in the joints.
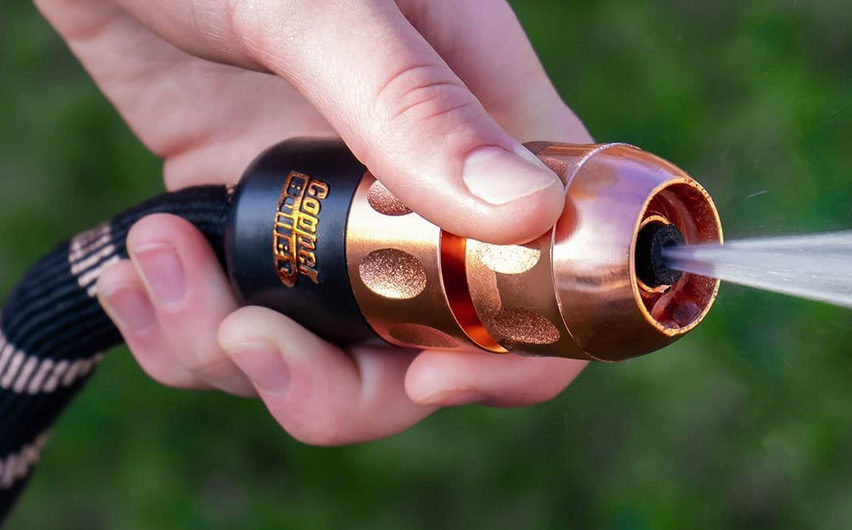
Hose with a high-pressure attachment
7) SAFETY TOOLS
- Eye protection/safety glasses if you are chipping or cutting stones and welding.
- Ear protection if you are using power equipment for either job or if you are operating a power compactor.
- Knee pads make kneeling in the sand for hours as you position pavers much more comfortable
- Sturdy work gloves for carrying rocks to swinging a mattock
- Steel toe work boots
8) POWER TOOLS
Vibrating Plate Compactor:
This tool, available for hire in most shops, is crucial at various stages of block paving installation.
This machine is used for vibrating kiln-dried sand (or polymeric sand) between clay or concrete pavers, and for consolidating hardcore.
You can manage without one, but if you’re bedding a lot of paving on the sand, it’s well worth hiring this tool.
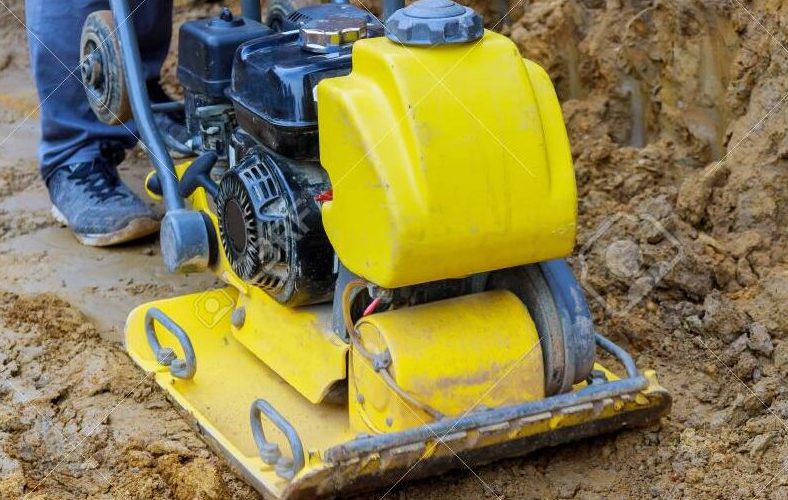
Vibrating plate compactor or Wacker plate
Brick Saw:
Indispensable for swiftly cutting all block paving. Grinder and diamond blades easily cut through steel, concrete, or rock up to a maximum depth.
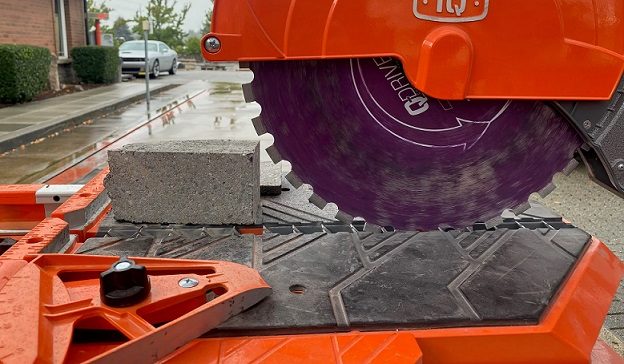
Masonry saw-cutting concrete blocks (pavers)
Block Splitter:
Alternative to cutting block paving.
Offers quick height adjustments via screws and easily splits paving blocks with manual pressure, providing precise cuts to fit unusual spaces and shapes.
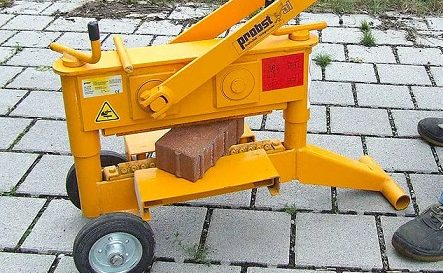
Block splitter splitting clay brick pavers
Cement Mixer:
Crucial for a steady supply of mortar for jobs that require a large volume of concrete. They can be rented in several sizes and may be powered by electricity, gasoline, or diesel.
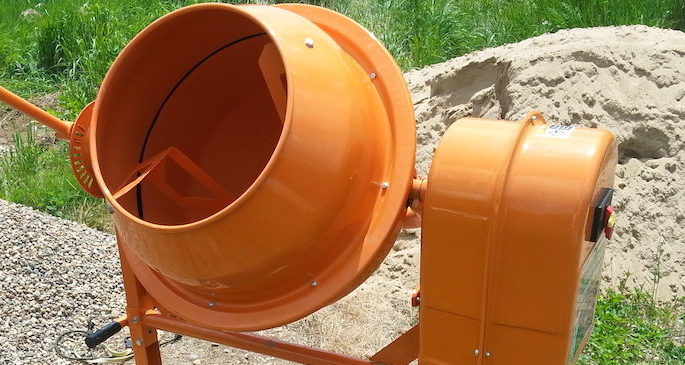
Continous cement mixer
Tips for Hiring Tools
Some projects call for expensive tools. It is often best to hire these. There are tool hire companies in most large towns. They will almost certainly be able to supply concrete mixers, angle grinders, flat plate compactors, paver splitters, and so on.
Always make sure you know how to use the tool before accepting it. Check for obvious defects before accepting the tool. Be especially careful to check wiring for signs of wear or loose connections.
It’s not just large or very expensive tools that are worth hiring. Crowbars, picks, and sledge hammers are all cheap to hire, and you may prefer this to buying your own if you’re not going to use them very often.
