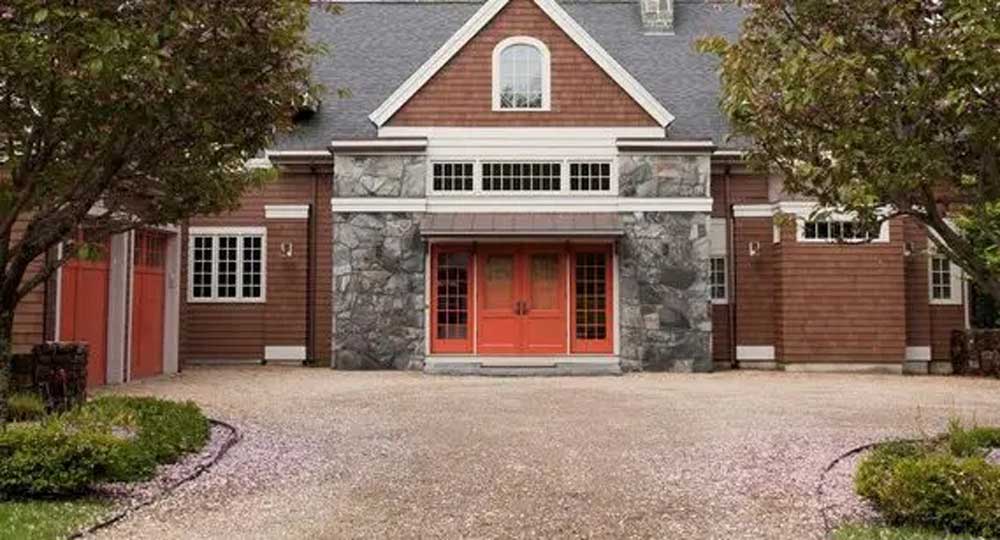
Howdy, Y’all! Today, I’ll guide you through the steps to buildin’ yourself a decomposed granite driveway. So, hang tight because if going to be fun.
Driveways are mighty important in connecting our communities. They serve as the passageways (both ingress and egress) between private property and public roads. And when it comes to driveways that won’t break the bank, I reckon nothing beats decomposed granite, or DG for short.
DG ain’t just affordable, it’s also solid and very once it’s properly installed and packed down; forming a solid surface that’ll hold up real nice.
But what in tarnation is decomposed granite, y’all ask? Well, DG is a kind of gravel, a derivative of weathered granite rock. Mother Nature does her thing and breaks that rock down into a sandy, crumbly material that can be scooped right outta a quarry or a gravel pit. It can be used straight from the pit without any modifications.
Now, the cost of this material can vary depending on where it’s mined and where you get it from. On average, you’re looking at about $70 to $120 for a cubic yard. That does add up to a pretty penny, especially for a big project. A cubic yard (weighing around 1.2 to 1.4 tons) is enough to fill up the bed of a standard pickup truck.
At first glance, DG might not seem like the toughest material for a driveway. But, when it’s spread out and packed down right, the gravel particles hold their own. They make a strong and stable surface that can handle being driven on. And if you want it even tougher, you can mix in a stabilizer, a binding agent. That’ll give it some extra oomph and make it last a “lifetime.”
Now, the installation process is pretty straightforward. You will just need the right equipment and some basic handy and creative skills.
Keep in mind, though, that decomposed granite is best suited for nearly flat or slightly slopin’ driveways. If you got a steep one, especially if it’s loose DG, heavy rain can wash it away leaving behind ruts, puddles, and potholes. For a steep slope, I’d recommend sticking with stabilized DG or considering other materials like crushed stone, concrete, or asphalt.
Basics of Driveway Construction
Understanding the proper shape and cross-section of a driveway surface is critical to its construction. Fundamentally, the driving surface should slope on either side from the center also known as the crown.
But here are the main parts of a driveway;
- A crown
- Shoulders
- Curbs/Ditches
- Proper drainage
With this information, the design should be relatively straightforward since you have a clear starting point and endpoint. Typically, a driveway will run from the base of your garage to the public road.
Crowned Driving surface
Having the proper slope is crucial for effective drainage and a safe driveway. The goal is for the water to flow off the surface and towards the shoulders and ditches on either side.
The slope or grade of the driveway can be expressed as a percentage or a ratio. My recommendation would be a 4% slope on each side of the crown or a 2:1 ratio. This means that for every vertical inch of rise or drop, there should be a 2-foot horizontal run.
Achieving a perfectly uniform crown throughout the entire driveway may be challenging if not impossible. But it’s important to minimize deviations. It’s advisable to stick a 4 to 6% slope from the crown. In terms of ratio, a 6% slope would be similar to a 1 2⁄5:1 ratio, or a 1 2⁄5-foot horizontal run for every inch of rise or drop.
To assist in maintaining the desired slope, crown gauges are especially handy. These are slope meter attachments that can be mounted on your grader, dozer, or skid steer for precision grading. Modern motor graders also come with electronic slope controls, allowing you to adjust the blade (moldboard) angle for the desired slope. These tools are particularly useful for precise grading, especially for longer driveways and road construction projects.
The best crown shape resembles that of a house roof from the crown to the shoulder or a “Straight A” pattern.
But do not go overboard with the crown slope. Excessive slopes can make drivers feel like they’re losing control of their vehicle, pulling them toward the shoulders. This forces them to stick to the middle of the road, regardless of its width.
Striking the right balance and maintaining the appropriate crown slope are essential for effective drainage and safe driving.
Shoulders/Fore slope
Now, the shoulder is the surface that slopes away from the edge of the crowned surface.
Shoulders serve 2 main purposes;
- First off, shoulders are like the traffic cops for water. They ensure water doesn’t pool on the road surface. Instead, they direct that water away, right towards the ditch where it belongs.
- Shoulders also support the edge of the driving surface, keeping things sturdy and stable.
Now, here’s the thing. Shoulders should not be higher than the edge of your driveway. Why, you ask? Well, high shoulders can be troublesome. They get in the way of water flowing into ditches. Water instead starts pooling up on the driving surface. In relatively flat terrain, that water likes to gather at the shoulder line and seep into the subgrade. Next thing you know, your driveway turns soft and unstable surface and gets all rutted up. In rugged terrain, it’s a whole different story. Water rushes down the slope, following that secondary ditch formed by the berm (high shoulder). This can significantly erode the driveway surface gravel and even the sub-base layer. It’s trouble, plain and simple.
Now, we have to be mindful of the shoulders being too low as well. We don’t want any steep drop-offs that can cause a safety hazard. It’s all ’bout findin’ the right balance.
Curbs/Ditches & Proper Drainage
Listen up, folks! A proper drainage system is often overlooked during driveway construction.
Now, creating a drainage system often involves pulling ditches on both sides of the driveway to direct water downslope. Even in arid regions, having a reliable drainage system is downright crucial.
We have to make sure that both surface and subsurface water gets directed off and away from the road surface. This is especially important in wetlands and swamplands where the subgrade is not strong enough to bear heavy loads. Without proper drainage, driveways in these parts tend to rut up and form potholes that’ll give ya a bumpy ride. And you know what that means? Gotta add new material and reshape that roadway frequently. Nobody got time for that! And when ditches get blocked by eroded soil or debris, well, we have to clean them up and get them back in shape so water keeps flowing as it should.
Now, lest we forget about culverts and bridges. They play an important role to play in helping that water flow beneath the driveway. They allow for the water to follow its natural course downslope. But here’s the thing. Regular inspection and maintenance are a must so that water keeps moving without obstructions. And let’s face it, over time, years, these structures need replacing. It’s just the way of the world.
So, folks, pay good attention to the drainage system, including ditches, culverts, and bridges. This way, your driveway handles water flow like a champ.
Tools & Materials
If you’re fixing to build yourself a decomposed granite driveway, you will need the right equipment, tools, and materials for the job. Preparation always gives you a leg up.
First off, you’ll need some trusty tools in your arsenal. Get yourself a hard metal rake to spread the material by hand. You might need to rent or borrow some machinery too. Think bulldozers, tractors with rear blades/box blade attachment, excavators, skid steers, drum rollers, or any other equipment that’s fit for cutting the ground, spreading that gravel, grading it out, and givin’ it a good compact.
Rolling a driveway is not always necessary as the weight of the machinery moving the surface will do the job.
Now, we can’t forget about safety and convenience. Don’t go out there without a good pair of work gloves. Gotta protect those hands, you know? And get yourself some heavy-duty landscaping fabric and stakes to hold it in place. Oh, and do not forget your trusty laser level, measuring rod, and stakes to mark the grade/elevation.
Now, let’s talk gravel materials. You will need that base gravel material and the decomposed granite itself. When it comes to sourcin’ gravel, pay attention, my friend. Get yourself a surfacing material that’s got the right blend of stone, sand, and fines: Proper gradation. And what are fines, you ask? Well, that’s the clay and silt.
Also, be sure that the base material is coarse with nice, angular particles. You want it to be clean and free of any fines. Why? ‘Cause that ensures proper drainage and that water gets shed right off that road surface.
Remember, that base layer ain’t just for show and drainage. It gives your driveway structure and stability.
Some folks like to add a middle layer between the decomposed granite and the base material. But you know what? That’s all up to personal preference. You do you, my friend.
Estimating Gravel Volume
Alright! If you want to get your driveway just right, you have to calculate the material volume as accurately as possible. But here’s the thing, you have to consider a few things along the way. We’re talking shrinkage due to compaction and material required to fill any depressions. We want to make sure that the surface is nice and level, so we might need some extra material in certain sections.
- First things first, let’s mark the area where we will spread the material. Get yourself some marking paint and make your mark.
- Then, grab a shovel or an edger and define the edges of the driveway.
- Now, it’s time to measure. Grab yourself a measurin’ wheel or a tape measure and get the length of that proposed driveway in good ol’ feet. And if you got curved sections, make sure to walk along the outer curvature. That way, you capture the longest path possible. Gotta be precise.
- Take that length measurement and multiply it by the average width of the driveway. That will give you the surface area, plain and simple. And here’s where it gets interesting. Multiply that surface area by the desired depth in feet, and boom, you got yourself the cubic footage. We’re getting real serious now.
- But hold on, we are not done yet. We have to convert from cubic feet to cubic yards as most material is sold by the cubic yard. How do we do that? Take that cubic footage and divide it by 27. Why 27? Because a cubic yard is equivalent to 27 cubic feet. And we all know a yard is equal to 3 feet. Do the math, my friend.
Here’s a little nugget of wisdom. Don’t forget about shrinkage. When you’re compacting that material, it’s going to shrink. Usually, you can expect a reduction of around 30% or more in volume once it is compacted.
Compaction is not necessary but it helps things stay put; nice and solid. We usually add the materials in lifts/layers moistening each layer and compacting. Get that moisture and compaction just right, and you’ll be in driving heaven.
You want to aim for at least 4 inches deep of base material. That’s gonna give you a solid foundation. And on top of that, you’ll need about 2 inches of decomposed granite. Oh, and this here saves you some bucks. The base material is cheaper than decomposed granite, so it’s a win-win situation.
Remember, the specific gravel material may vary depending on where you are. Get yourself the highest quality material with the right gradation. And when you’re loadin’ up from the stone yard or quarry, be sure that there is no segregation taking place.
Driveway Permits
Before constructing or modifying a driveway, it is typically necessary to obtain a state highway entrance permit and meet certain requirements. These requirements involve submitting a site plan that has been approved and stamped by a professional engineer, as well as a traffic control plan.
Driveways for single-family homes or farmland generally fall under residential driveway regulations. However, driveways serving multi-family properties or commercial properties that provide access to private or public areas are subject to commercial driveway regulations. For specific types of developments, joint access driveways and frontage roads may be considered. But their construction requires written agreement among the parties involved.
Furthermore, driveways that connect to state routes must adhere to the most stringent standards set by either the Department or the local government.
To minimize stormwater flow onto public roads, driveways must be designed with a maximum side slope of 6:1 (6 feet run for every one inch of rise or drop). Additionally, if the culvert ends face oncoming traffic, a side drain end wall with grates may be required.
Decomposed granite Driveway Installation (step-by-step)
A driveway construction often involves the following steps;
- Grading
- Laying the landscape fabric
- Adding a layer of sub-base material
- Adding the decomposed granite
1. Grading
Before you kick things off, reach out to the utility line service at 811. They’ll help you locate utilities on your site. And if need be, make arrangements to relocate ’em.
Figure out where you want your driveway, how long it is going to be, and what shape you would like. And if you’re feeling fancy, throw a parking lot and lighting. Use stakes to mark that grade, and grab an edger to define the edges nicely and clearly. We want straight lines and smooth curves, folks.
Now comes the fun part, grading the area. Time to bring out heavy-duty machines like excavators, motor graders, dozers, skid steers, or towed tractor-mounted drag-type graders. Ideally, we want to excavate the soil down to that clay subsoil and compact it well and smoothly. That will give us a nice and solid base to work with.
Dig that area down about 6 to 12 inches deep, depending on the slope and how much traffic we’re expecting. Use that soil from high spots to fill the depressions and low spots for a nice and level driving surface.
Clear out all that topsoil, vegetation, trees, roots, stumps, and big ol’ rocks. You can stockpile them on slopes or ditches, or dump them in a landfill. And don’t forget to trim the branches that hang over the driveway. We need enough clearance up there. And if you got big clumps of soil, break them down.
Don’t forget about drainage during this phase. When it comes to bridges, culverts, and other drainage structures, we have to do it right. Proper installation is key.
And to keep sediment runoff at bay, implement some sediment control measures like vegetative buffers, silt fences, and inlet protection for the culverts. Consider using erosion control wattles, erosion bales, and erosion control blankets to keep everything in place and promote stability.
2. Lay Landscape Fabric
Before we start laying down that landscape fabric, make sure the soil surface (subgrade) is as smooth as a Texan drawl. No rocks, stumps, or debris should be in our way.
We need something heavy-duty and woven. It lets water pass through but still does a fine job of keeping gravel separated from the soil.
When laying the fabric, keep folds and creases to a minimum. And if you need to overlap sections, use a nice 1 to 3-inch overlap. Use pins and staples to hold and anchor it in place.
Now, here’s an important tip: don’t go drivin’ equipment directly over that fabric. It’s a delicate soul, and we don’t want to damage it. Instead, have the driver reverse-roll spread the material or push that material over the fabric while you’re driving on the gravel section of the driveway.
And when the wind starts blowing, don’t roll out the fabric too far in advance.
3. Add the sub-base gravel
Choose a road base gravel that consists of angular stones measuring 1 to 4 inches in size. It is crucial to ensure the cleanliness and proper drainage of the sub-base.
Add the gravel in 3 to 4-inch lifts, and compact each layer using either a hand roller or a mechanized roller. When spreading the material, avoid sudden stops, starts, or turns. The final compacted thickness of the gravel layer should be at least 6 inches. Skilled drivers can make the spreading process a breeze by dumping and spreading the material directly on the surface to the desired thickness. This is done by either tailgating or reverse roll spreading.
If desired, you can construct a border using bricks, landscaping stones, or timber after the material has been dumped and spread.
The ease of grading operations will depend on the quality of subgrade preparation and compaction, as well as the proper placement and compaction of the sub-base material. Hiring professionals who have a deep understanding of their job will greatly enhance the effectiveness of the entire process.
4. Add the Decomposed Granite
Begin by spreading the top layer of gravel onto your driveway in lifts, ensuring that the loose depth does not exceed 4 inches and that the surface is smooth and level. If you have access to compaction equipment, apply water to the decomposed granite (DG) as needed to achieve the optimum moisture content for maximum density and stability.
Compaction of the material is crucial whenever possible, and suitable compaction equipment includes sheepsfoot, drum roller, or pneumatic roller compactors.
Once the material is evenly distributed, use a grader to spread it uniformly across the surface while maintaining a 4 to 5% crown. Use a shovel or rake to eliminate any bumps and divots. The prepared surface should be finished within ± 0.5% of the desired cross slope for the final gravel surface.
As a general rule, each gravel layer should twice as thick as the top-sized stone. For example, if the top-sized stone measures 1 inch, the layer thickness should be at least 2 inches. Be cautious and avoid casting material off the edge of the driveway where it cannot be recovered.
Machine Operations
Maintaining the right speed is important when it comes to grading operations. You don’t wanna go speeding like a runaway horse. Slow and steady wins the race, folks. Keep that machine moving nice and slow for stability.
Now, when your machine starts to bounce and lope, it can cause depressions and ridges ruining our hard work. Solving that bounce problem takes some know-how and experience. Sometimes, all you gotta do is dial back that speed a bit, and the bouncing goes “puff“.
Adjusting tire inflation pressures can also help keep that machine steady. Some folks even go ahead and fill their tires with liquid ballast to about 70%. That gives them more traction, weight, and overall stability.
Now, when you’re connecting that gravel driveway to an existing paved road, here’s what to do. Start leveling that crown of the gravel driveway about 50 feet from the pavement’s edge. We want that gravel driveway to line up smoothly and seamlessly with that paved surface. No spilling gravel onto the pavement. That messes with skid resistance and creates a safety hazard.
And when you’re coming up on a bridge, gradually remove that crown from the gravel driveway before you hit the bridge. We wanna match the elevation of that bridge deck, so it’s all nice and even.
Now, sometimes, we gotta deal with curves. That’s when banking comes into play. You want the outer edge of the road to be higher than the inner edge. The driveway surface should run in a straight line from the higher edge to the lower edge all through that curve. Keep it consistent and uniform.
Dust control & Stabilization
Gravel driveways, including decomposed gravel roadways, typically generate varying levels of dust based on the volume of traffic.
Regions with arid climates and extended dry periods tend to accumulate more dust compared to areas with frequent rainfall. Fortunately, decomposed granite (DG) is a naturally weathered material with a lower dust content.
However, all driveways produce dust and experience the chipping of larger gravel particles to some extent. This necessitates the implementation of dust control and stabilization measures by incorporating a binding agent into the gravel.
Stabilizing a DG driveway can be costly, but the long-term benefits outweigh the expense. Hardening decomposed granite results in a stable surface that mitigates the loss of fines through dusting. It also reduces issues like wash boarding, rutting, and pothole formation.
The binding agent or stabilizer can be incorporated into the material either on-site or at a plant facility off-site. Appropriate rates of application vary depending on the product, weather conditions, and other factors.
Types of Stabilizers
There are several products available for hardening and stabilizing decomposed granite driveways, including:
- Moisture-absorbing salts (chlorides): Salts such as calcium chloride, magnesium chloride, and sodium chloride are hygroscopic, meaning they draw moisture from the air, keeping the surface constantly moist.
- Resins & Polymers: Resins and polymers can be blended into the driveway surface to bind the DG particles and form a hard and stable concrete-like surface.
- Petroleum oil products: The use of oil products such as emulsified asphalt may be effective, but it is banned in many places. Approval from local regulatory agencies, such as DEP or EPA, should be sought before using these products.
- Organic non-petroleum oil products: These products are usually derived from vegetables and pine oils and are biodegradable.
- Natural clays: Natural clay additives with high plasticities, such as bentonite, can enhance the cohesion and stability of the gravel driveway. The clay is mixed and blended into the gravel carefully to provide a strong, dust-free bond.
- Soil cement: This is an expensive treatment compared to other options, but it can be used to reduce dust and provide long-term stability.
There are numerous stabilizers in the market, each marketed under different trade names. Preparation and application instructions are typically provided by the supplier.
Applying stabilizer
Stabilizers usually come in either liquid or powdered forms.
- Powdered stabilizers can be premixed into the material or added directly to the loose pre-hydrated DG, watered in, and then compacted.
- Liquid binders are usually sprayed on the surface using a special calibrated pressurized sprayer that delivers a uniform amount of the treatment.
- Pellet or flake binders are also available for surface treatment or premixing.
Before applying any surface treatment, ensure that the gravel has an adequate amount of moisture to allow for quicker absorption into the gravel. Applying the products to dry gravel is not effective as the treatment will not infiltrate the surface properly, leading to premature failure.
Ensure the driving surface gravel has good gradation with an appropriate ratio of stones, sand, and fine dust particles.
If rain is expected, refrain from applying the products. Rain can dilute the treatment before it has time to cure. Typically, a day or two of full sun is required to ensure the material dries and properly cures. Rolling the surface can also be helpful.
It is always wise to test the product on a section first to assess its suitability
Driveway Maintenance
Gravel driveways are susceptible to failure under heavy loads and wet conditions. Insufficient subgrade strength and poor construction practices are major contributors to distress and failure.
Prolonged periods of wet weather can lead to the development of ruts and potholes. Meanwhile, dry conditions cause the displacement of gravel material onto the shoulders and ditches. To address these issues, the gravel is typically pulled back from the ditches and shoulders to the roadway.
Additionally, addressing drainage problems is crucial. If the driveway has lost its crown, developed potholes, has high shoulders, or has severe rutting due to wet conditions, these problems must be resolved. Scarifying the surface using a rake or grading equipment, reshaping the crown, and compacting the material are necessary steps.
Subsequently, a fresh layer of decomposed gravel can be evenly applied. Even if the existing road appears smooth and hard, it is advisable to lightly scarify the surface to break the crust and ensure a strong bond between the new and existing materials.
Spring is an ideal time for maintenance work.
When a driveway is properly maintained and has the appropriate cross-section, it effectively preserves the condition of the surface and shoulder for a long time.
To Wrap Up
It is important to recognize that gravel surfaces will never perform as well as pavements. Some loose aggregate, rutting, and corrugation may occur even in the best gravel surfaces under heavy traffic.
Using high-quality materials can help improve the performance of gravel driveways. Constructing a gravel driveway can be a DIY project. But it can also be physically demanding, and professional assistance from a reliable driveway company may be preferred.
So there ya have it, folks. A down-home guide on buildin’ yourself a decomposed granite driveway. Now go on out there and get to work!
