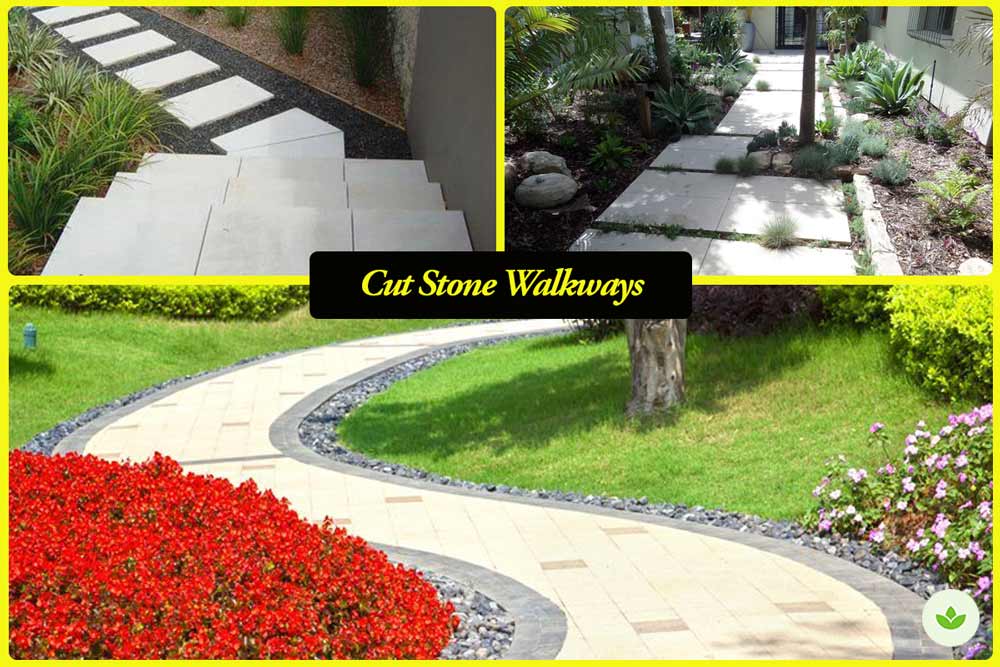
Cut stone is a handsome paving material typically shaped as squares or rectangles. It creates paths and walkways that are formal and neatly kept and is best used for straight paths or paths with gentle arcs or curves.
Tightly laid, a cut stone walkway is a good route for major garden areas and subordinate paths. These stones can also be used as stepping stones.
Beware that cut stones can reflect or retain heat more than rougher stones. What’s more, cut stone in a garden can become monotonous, or too formal; to break up that formality, combine it with brick, granite setts, fieldstone, or gravel in any number of ways. Gateways or entrances are especially good places to change from one paving material to another.
Types of cut stone
There are several types of cut stone across America.
- In the Northeast, Pennsylvania bluestone is readily available. It is dark gray, though it can sometimes have a rusty red wash or streaking from iron deposits within it.
- Bluestone and the various sandstones available in the West, have a texture that assures good grip
- Slate and marble cut stones are also available, but while both make handsome walkways, they are so smooth they can become slippery when wet or mossy. Slate is best avoided altogether as a paving material; it is slick wet or dry, and it sloughs off at the edges and even on the surface.

Cut-Stone-sidewalk

Cut stone walkway

Cut stone walkway

Cut stone pathway

Cut stone path

Cut stone path

Cut stone footpath

Designing a Cut stone walkway
It is far easier to design a cut stone walkway by sketching.
Start by determining the direction and width of the path. To visualize how the path will look, lay it out with stakes and a string line. Try to have the shapes relate to nearby lines of the house or outbuildings.
Paths must be wide enough for their purpose. Consider a 4 or even 5-foot wide path that might, at some point, widen to form a patio, terrace, or entrance court. Where steps might go, use sections of 2×6 lumber to help you visualize them.
Once you have settled on a layout, measure and make a scaled drawing of the pathway on graph paper. Familiarize yourself with the sizes and shapes of available stones for use on the scaled drawing.
Consider the whole range of possibilities, from using only two or three sizes of stone set in a repeating pattern the length of the walkway to using any number of sizes to form a more complex pattern.
Consider laying repeating patterns using stones of similar size, alternating square and rectangular stones, juxtaposing large and small stones, or setting stones on a diagonal. Smaller stones can dislodge if they are used along the edge of a cut stone path; save small stones for the interior of the path and use larger stones on the edges.
If you are creating a random pattern with stones of different sizes, use one of your largest stones as the threshold to stabilize the beginning of the path. The first and last stones, or any stones that mark a juncture to a secondary or side path, should be the largest in the walkway. These threshold stones are important cues in a design, and they are the first to be set on your paper layout.
No stones must be laid so that their joints form a cross. Lay stones so that their joints form a “T” or an “L” and the design will remain coherent.
You can also combine cut stone with other materials, from bricks and tile to crushed gravel, or leave open spaces within the design for planting creeping thyme or another path herb.
Once you have settled on your design, you know the number and dimensions of stones to order.
To the front door
Cutstone is most appropriate for creating straight or broadly curving paths leading to the front door at which point they can be extended to form broad steps or a generous landing. The primary path should be as direct as possible and can be used to help design secondary paths.
Broad stones for your main path provide sure footing, unlike a stepping stone path where your attention must stay glued to the ground. You can walk the path knowing your feet will land on a firm surface each time.
To a side or back door
Cut stone is an excellent material to create formal secondary paths out from the house or outdoor sitting area (cut stone patio or terrace) into a nearby garden or even an orchard.
These paths link the house to other elements of the garden while at the same time providing places for trees, perennial beds, shrubs, garden ornaments, gateways, trelliswork or archways, or any number of features.
Curving paths
Cut stone can also be used to create curving paths, though the shaping of the stones is best left to professionals.
The logic of curved paths is established by existing and additional plantings, contours in the landscape or other features.
A curving cut stone pathway need not be as sinuous; it can be used to make much broader, simpler curves that require much less cutting.
Cutting Stone
During installation, you may want to trim some of your cut stones to smooth their shapes or to adjust the shape.
If you find you have a lot of cutting or need to cut curves into some of your stones, you may want to hire a masonry professional.
But if you are comfortable handling a circular saw, make straight cuts yourself.
- Wearing eye and ear protection, use a circular saw equipped with a diamond blade to score the stone where you want to cut to a depth of about 1/2 inch.
- As a cutting guide, use a sturdy piece of lumber.
- Lay the stone on top of the wood, setting the scored line just above the edge of the boards.
- Press or tap with a hammer on the center of the section to be removed and it should snap off easily
- If you are only cutting off an inch or so, go ahead and cut through the stone
If you are using relatively soft bluestone, sandstone, or limestone, you may discover as you proceed that some of the stones purchased aren’t shaped right. You can make straight cuts easily; curves are another matter and best left to professionals.
Another way to cut relatively soft stones is to use a mason’s scribe. This is a light, sharp, carbide-tipped, two-bladed instrument. Scribe a line three or four times across the stone and then tap the piece you want to break off with a blunt cold chisel along the score line and it will snap.
Cutting the stones takes time and effort but the result is a set of sinuous paths.
Laying a Cut stone walkway: Step-by-step
Step 1: Prepare the base
The standard path gravel base works well for a dry-laid cut stone walkway. However, if your stone is thin and brittle, you will want more stability. You can either replace the washed gravel with crusher run or pour a concrete base and mortar your stones in place.
The base could be set in a foot-deep trench. Place 8 inches of crushed stone in the bottom of the trench over which you lay a hefty woven landscape cloth. Over that. goes 2 inches of sand on which a 2-inch thick cut stone is laid.
Digging the trench is easier said than done and crushed stone is very difficult to shovel. Hire a contractor with a small backhoe to do the trenching and backfilling with crushed stone. Then you can lay the stone; the easier, fun part of the job.
Step 2: Laying the stone
If a path leads to or from a building, start work next to the building working toward the other end. If the path runs from one structure to another, work from both ends toward the middle so you are sure to place the best stones near the buildings. If you are building a path on a slope, start at the low end and work uphill.
Start by choosing one of the largest stones to form the threshold stone. Roughly place the large stone first and then try out a few other stones near it to get the feel of how they will look together and how far apart they should be.
If you want a tightly set feeling, they can be butted one to the next but given that the stones are never perfect, it might be best to leave 1/4 to 1/2 inch gaps between stones as room for adjustment and drainage.
Laying stone on a sand base
Begin laying the stone on the sand, according to your paving pattern design.
You can set them tightly against each other but this may require much more additional cutting. To avoid that, leave gaps of 1/2 to 1 inch between each stone. These spaces give you room for adjusting the stones and help with drainage.
After setting 4 or 5 stones work them back and forth into the sand, then tap each several times with a deadblow mallet to set it.
Note: Don’t step on the stones until they are completely supported underneath; many 2-inch thick stones will readily snap underfoot if not properly supported.
Each time you set a series of stones into place, use a level to check that the stones are even and the surface of your path is flat or slightly sloping for drainage. Placing your level on top of a 6-foot piece of lumber laid across several stones will ensure that crooked stones do not become inaccurate reference points for the path.
When your path is laid, spread sand over it and sweep the sand into the gaps. The gaps are backfilled with sand leaving about a half-inch between the top of the stone and the sand so the sand won’t scatter onto the surface.
Spray water across the surface, walking back and forth on the stones until the sand feels thoroughly wet and settled. You may need to add more sand to the gaps to bring them to about 1/2 inch below the tops of the stones.

Laying stone on a concrete base
If your mortaring your stone in place, you will not be able to easily change your mind about stone placement. So, be sure you are happy with your pattern before beginning.
Excavate the soil to at least 10 inches and put in a 6-inch layer of crushed stone. Cover with a wire mesh for reinforcing and then a 3-inch layer of concrete. A good proportion for such a foundation would be 1 part cement, 3 parts sand, and 5 parts gravel.
After allowing your concrete base to set overnight, use a trowel to spread a thin 1-inch layer of mortar on top of it and set your stones according to the pattern. A standard mortar recipe is 1 part dry cement to 3 or 4 parts sand.
When the stones are set, the gaps between the stones can be mortared in, using a trowel to drop into the gaps of the trowel to smooth them. Wipe off any cement mixture that spills onto the stones with a damp sponge.
You can tint the mortar you use to fill the gaps with coloring agents so that it blends well with the color of the stone. That way, the gaps will not be in stark contrast.
Step 3: Edge the cut stone walkway
If the cut stone path runs along the edge of a perennial bed, it might be a good idea to use the same stone set on the edge to create a low retaining border.
Set foot-wide stones on the edge, so they are 3 or 4 inches above finish grade. In this way, soil cannot leach onto the surface when you weed, or during heavy rains.
That edging will not only hold soil in place but also create a neat edge to the path
Step 4: Add planting
The formal lines of cut stone can be softened by plantings between the gaps (green joints) and on the edge- parallel to the walkway so the path does not appear too severe.
Where cut stone path broadens into a patio or where the path itself is sufficiently wide to allow plantings, perennials such as lady’s mantle and feverfew, woodsy sub-shrubs like lavender or ground-hugging plants can be planted.
Cutstone paths can also double as the edging for perennial or shrub borders, preventing nearby lawns from creeping into the beds.
Cut stone steps
If steps are required because of too steep a grade, start at the bottom and work toward the top.
Build up risers and treads with the same stone used for paving the walkway, or use other complementary stone or brick being certain to follow the dictum: twice the riser plus the tread must equal 26 inches.
Lay sections of stone to form the face and sides of the riser. Then back-fill the resultant space with either crushed stone or stone dust, not sand- rain water will wash it out. Tamp the gravel down to form a solid base for the tread stone. Use your level to be sure the step slopes ever so slightly forward so that drainage is certain.
Cut stone steps should have a slight overhang or nosing where the riser meets the tread so that a shadow forms just under the edge of the step. This shadow tends to emphasize the horizontal and mark the steps.
Maintenance
Dry-laid stone may need occasional reworking to keep the surface smooth. Tree roots may need to be cut out and the surrounding stones reset from time to time. If the sand in the gaps between stones washes out or settles in too deeply, you may need to add more. Finally, you’ll want to weed the cracks between the stones as needed.
Mortared stone on a concrete base should require no more maintenance than occasional sweeping.
If properly laid, such a path of closely fitting stones is also among the most maintenance-free of all walkways. It is flat, providing sound, dry footing that is comfortable to walk on, even barefoot and it is easily shoveled in those areas of the country where snow falls.
