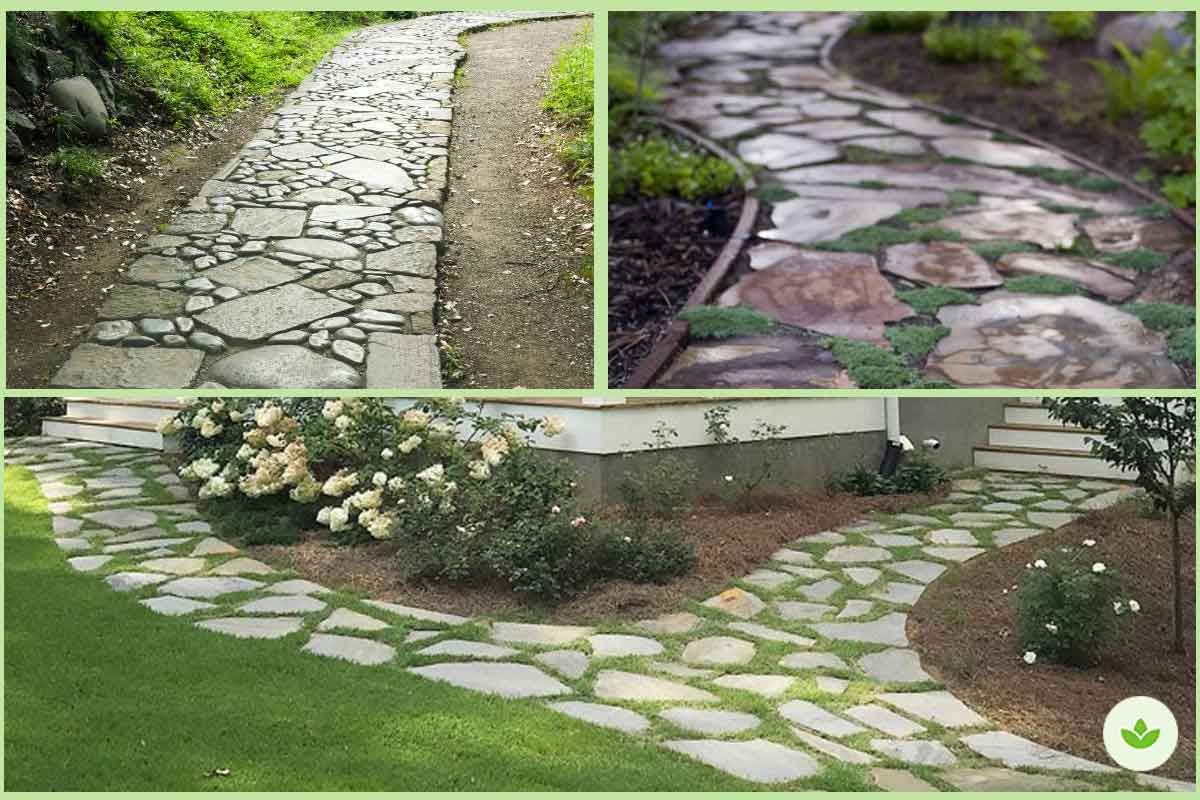
Randomly shaped stones of all kinds make charming, informal paving for paths.
Fieldstone, collected from fields or old dry-laid walls often has an appealing rough or weathered rock. Quarried stone, dynamited or pried from large veins in the earth can have a jagged, stark, or clean appearance. Common types of quarried stone include sandstone, granite, and limestone.
Because the shapes of natural stones are so variable, you will have to design the path on site. You can use stones that have a similar size, outline the path with large stones fill the center with smaller ones, and develop a pattern of alternating shapes.


The base
The base can either be washed gravel, crusher run, or concrete base so stones can be mortared in place.
Natural stone path on a sand base
Begin by laying several stones along the outer edges of your path. Do not settle the stones permanently at this point- just set them on top of the sand.
Next, fill in between the outer stones according to your design, shaping stones with a mason’s chisel and/or hammer so that they fit together well. Use a mason’s chisel to score stones where you need to trim them and a heavy hammer to do the actual breaking, chipping, and shaping.
It is best to set the stones about 4 inches apart, using larger stones on the edges and saving smaller ones for the center of the path.
Once you have several feet of the path laid out the way you want it, set the stones more firmly. First, settle them in place by hand, working them back and forth in the sand. If you set the stones approximately 1/2 inch above the adjacent soil, the path will drain better. Then, tap each stone with a rubber mallet several times to set it in place.
If your stones have rough surfaces, a level will not always be accurate in making sure your path is flat or appropriately sloped; you will learn to use your eye as well. If the surfaces of your stones are flat, however, use a level to check your path as you finish each section.
After laying the stone, fill the gaps with sand to within 1/2 inch of their tops and spray the path roughly with water to allow it to settle. The path will continue to settle as people begin to use it. If you want to plant creeping plants or herbs or place bits of moss in the gaps between the stones, substitute topsoil for sand when filling the gaps
Stone path on a concrete base
If you are looking for maximum stability, mortar the natural stone path in place.
If you’re mortaring your cut stone path surface (rather than dry-laying it on sand) you won’t be able to easily change your mind about stone placement, so be sure you’re happy with your pattern before beginning.
After allowing your concrete base to set overnight, use a trowel to spread a thin, 4- to 1-inch (2-cm to 3-cm) layer of mortar on top of it and set your stones according to the pattern. Add more mortar to the gaps between the stones, using a trowel to drop it into the gaps and the edge of the trowel to smooth them. Neatness counts; wipe off any cement mixture that spills onto the stones with a damp sponge.
A standard mortar recipe is one part dry cement to three or four parts sand. You can tint the mortar you use to fill the gaps with coloring agents (sold where cement is sold) so that it blends well with the color of the stone.
Maintenance
Dry-laid stone may need occasional reworking to keep the surface smooth. Tree roots may need to be cut out and the surrounding stones reset from time to time.
If the sand in the gaps between stones washes out or settles in too deeply, you may need to add more.
Finally, you’ll want to weed the cracks between the stones as needed. Mortared stone on a concrete base should require no more maintenance than occasional sweeping.
